Build Masterbrain - a Mastermind-like game using only an Arduino
Normally, Arduino projects include extra hardware to hook up to the Arduino to do fun stuff. But the Arduino has some amazing capabilities right out of the box. With the use of the Serial Monitor in the Arduino software, you can send data to and from Arduino. Let's do this to create the fun and challengin game of Masterbrain.
|
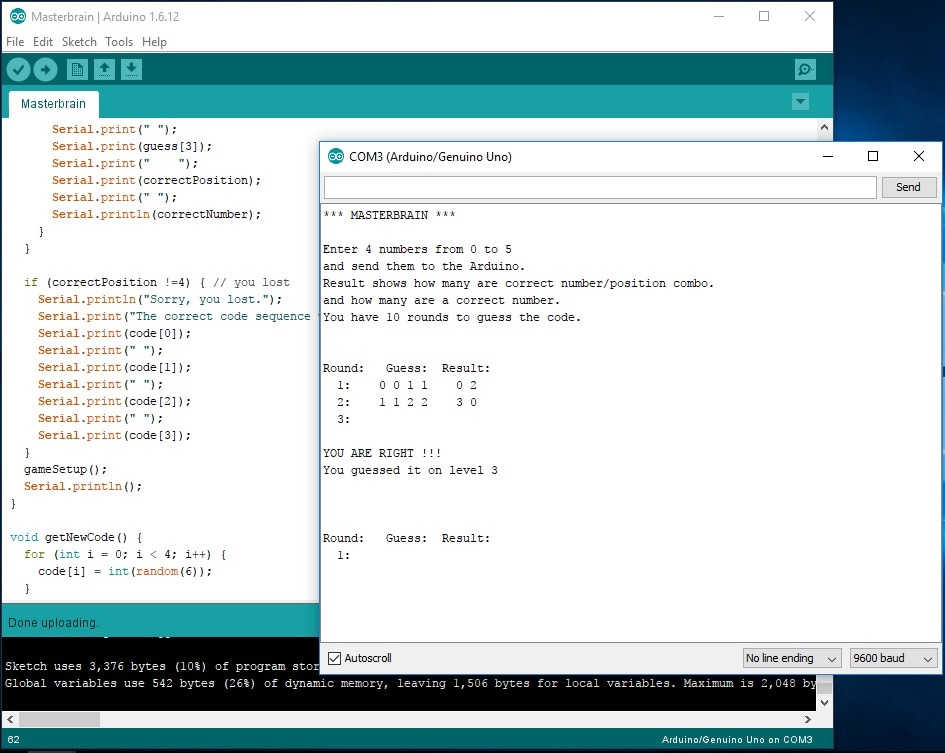
The game is played like the classic game Mastermind. You will have 10 guesses to solve a hidden code. The code consists of 4 numbers from 0 to 5. You guess the number by entering 4 consecutive numbers into the Serial Monitor of the Arduino software and send then to the Arduino. You must guess the correct numbers and have them in the right order to break the code. The Arduino will evaluate the guess and tell you if you are right. If you are not, it will give you a 2 digit response. The first digit will tell you how many of your four guesses are exactly right (right number, right spot). The second digit will tell you how many you have right but are in the wrong spot. By manipulating your guesses and looking at the feedback, you can deduce the correct code. But can you do it in 10 moves or less? Try it and see.
|
|
Click the file below to download the completed sketch
| masterbrain.ino |
The sketch was generated with very minimal code. That means there is no error checking. This is specifically important for the user input. Make sure you only enter 4 numbers, no spaces or commas, and then send the guess to the Arduino. The output is also pretty bland. This code should give you a good starting point to modify it and make this game your own. Below, I will highlight some of the programming decisions.
int code[4] = {0, 0, 0, 0};
int guess[4] = {0, 0, 0, 0};
int correctPosition = 0; // How many are in the correct position
int correctNumber = 0; // How many are correct number/wrong position
The variable declarations happen outside of any code. This makes them "global" variables and will be accessible from all places in the sketch. This is usually not the way good programmers operate because it leaves open the potential of modifying it in a subroutine inadvertently. However, it does make the code more compact and removes the requirement to use pointer and references so it can make the code easier for beginners to understand. The code[4] variable is an array that will hold the actual code the Arduino picks. The guess[4] array will hold the guess inputted by the user. The correctPosition and correctNumber variables will hold the returned clues based on the user's guess.
Serial.begin(9600); // Start the Serial port
randomSeed(analogRead(0));
gameSetup();
In the setup() section, we will initialize the Serial port so we can receive and send data. The second line is a trick to make sure we generate a new random number. By setting the seed of the random number to an unused analog port, we add a random value to initiate our pseudorandom generator. If we don't do this, the game may pick the exact same sequence every time we start it up. The gameSetup() routine will be written by us and used to initialize the game at the beginning and when it is restarted.
In the loop() routine, we will perform the repetitive tasks of getting user input, checking the input, and giving feedback.
Serial.println("Round: Guess: Result:");
for (int i = 0; i < 10; i++) { // There are 10 rounds
Serial.print(" ");
Serial.print(i + 1);
Serial.print(": ");
getUserGuess();
Here, we print out a heading for the output and start the sequence of 10 possible turns. The for loop uses the variable i which will go from 0 to 9 (the level we are on will be represented by i+1). We then call the routine getUserGuess(). Let's look at that.
void getUserGuess() {
while (Serial.available() == 0) {} // Wait for data
int indx = 0;
while (indx < 4) {
while (Serial.available() > 0) {
guess[indx] = Serial.read() - 48;
indx += 1;
}
}
}
The first 'while' waits for something to be available on the Serial port which would indicate that the user has sent a guess. The second 'while' waits until 4 numbers have been received. The third 'while' gets the data and stores it in the guess array. The data send over the serial line is in a char format. It is the code for the character that is sent so a 0 that is sent, shows up as 48. One way to turn this into a number is to just subtract 48 from the input. This only works because we are using numbers for our inputs.
When this routine returns, the guess array will be filled with the users guess.
The next line runs a function and branches depending on the result.
if (checkUserGuess()) {
checkUserGuess is the function that does the computation for the comparison of the code and the guess. Here it is.
boolean checkUserGuess() {
correctPosition = 0;
correctNumber = 0;
boolean usedGuess[4] = {false, false, false, false};
boolean usedCode[4] = {false, false, false, false};
The arrays usedGuess and usedCode will allow us to keep track of the guess and code values that we have already accounted for. Since numbers can be repeated, we don't want to cancel out multiples of a guess without first checking to see if a multiple exist. As we account for guesses and code digits, we will assign these array elements a true value, and then make sure we don't check them again.
for (int i = 0; i < 4; i++) { // check for right position
if (code[i] == guess[i]) {
// the guess is correct and in the right position
correctPosition += 1;
usedGuess[i] = true; // Mark the guess and code position as used
usedCode[i] = true;
}
}
// Now check for right number with what is not yet used.
for (int i = 0; i < 4; i++) { // i represents the guess
for (int j = 0; j < 4; j++) { // j is the actual code
if (!usedGuess[i] && !usedCode[j] && (code[j] == guess[i])) {
correctNumber += 1;
usedGuess[i] = true;
usedCode[j] = true;
}
}
}
if (correctPosition == 4) return true;
else return false;
}
This function returns with a true if the guess is correct and false if it is not exactly right.
The rest of the code uses this response to either congratulate the user on solving the code or presenting the clues and cycling back for another run.
I hope you find this a fun, quick Arduino project and modify the code to make it better and even more fun.
