Build a Simple Reaction Timer with Arduino and Test your Reflexes
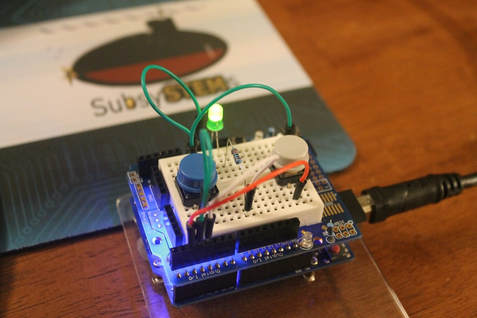
Arduino is an amazing platform for quick experimentation. Use an Arduino, a couple of switches, and an LED to make this reaction timer and see who in your family has the quickest response.
|
We will connect a switch to two of the Arduino's pins and an LED to another. One switch will be the START switch which starts the test. After the START switch is pressed, the test has begun and the LED will light after a random amount of time. When the LED lights, quickly press the HIT switch. The time between the lighting of the LED and you activating the HIT switch is then reported on the Serial monitor. The test will repeat automatically for 5 times so stay alert for the next LED lighting. After you have completed the 5 trials, the Serial output will show the average reaction time for the 5 runs. You can then press the START button again to redo the test.
You could experiment with keeping a tally of your reaction time under different circumstances. Check your reaction in the morning, at night, after eating, after exercising, etc. |
|
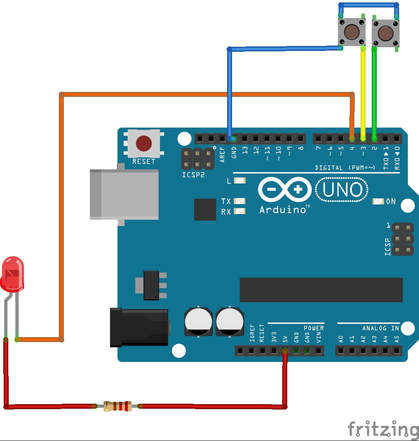
The circuit is really simple. The negative side (cathode) of the LED is hooked to pin 4 of Arduino. The positive side (anode) is connected through a current limiting resistor (330-1000 ohm) to +5V. One side of each switch is connected to Ground (GND). The other ends are hooked to the Arduino pin 2 (START switch) and pin 3 (HIT switch).
Click the file below to download the completed sketch
| arduino_reaction.ino |
The sketch was generated with very minimal code.
After initialization of the pinModes for the switches and the LED, the code randomizes the random number generator and starts the Serial port for output.
The code then waits for the START switch to be pressed. The code then enters the testing loop where it will repeat the test 5 times. When the random time is reached, the code saves the time and lights the LED. It then waits for the user to press the HIT button. When pressed, the code saves the time difference between the start and end of the run, turns off the LED, and saves the value to calculate the average at the end of the 5 runs.
After the 5 runs are complete, the code outputs the average time and resets to the beginning where it waits for the START button to begin another run.
There are lots of great experiments you can do with this simple reaction timer. Experiment and have fun!!

