Use MIT's App Inventor to create an app that displays the current Bitcoin price
If you are like me, you have gone through a couple of cell phones over the years and probably still have one or two lying around doing nothing. Well, there is a great way to utilize these technological wonders by turning them into internet appliances.
A typical phone has a robust computer, lots of memory, wifi and Bluetooth radios, GPS, and much more. If you had a way to program them, you could use these to do some neat little jobs. That’s what we are going to do.
The Android operating system is an open programming environment which means, technically, no one owns Android and as such, anyone can have access to this programming language for free. And there are a ton of resources to help you get started with Android programming. We are going to look at the possibly the simplest and easiest to learn: the MIT App Inventor.
The MIT App Inventor is a web based programming tool for creating Android programs with visual programming tools and transferring them to a phone.
Let’s use App Inventor to create an app that displays the current Bitcoin price (why not?). The app will initialize, make a call to an online price server, receive the response, and print it to the phone display. If this sounds tough and complicated, wait till you see how easy the App Inventor makes it.
The site is at appinventor.mit.org.
Sign in with them and you will be able to create your own app. After signing in, click on Start a New Project. When it asks for the name, type BitcoinPrice. The project name can’t have any spaces in it.
Sign in with them and you will be able to create your own app. After signing in, click on Start a New Project. When it asks for the name, type BitcoinPrice. The project name can’t have any spaces in it.

Click OK and you will be taken to the project page. There are two major screens in App Inventor.
Designer: This is the screen where you place items in your app that your app will need to run. This is where you drop in the User Interface (UI) elements like buttons, pictures, text boxes, etc.
Blocks: This is the screen where you will place code block that determine how the items placed in the designer will act.
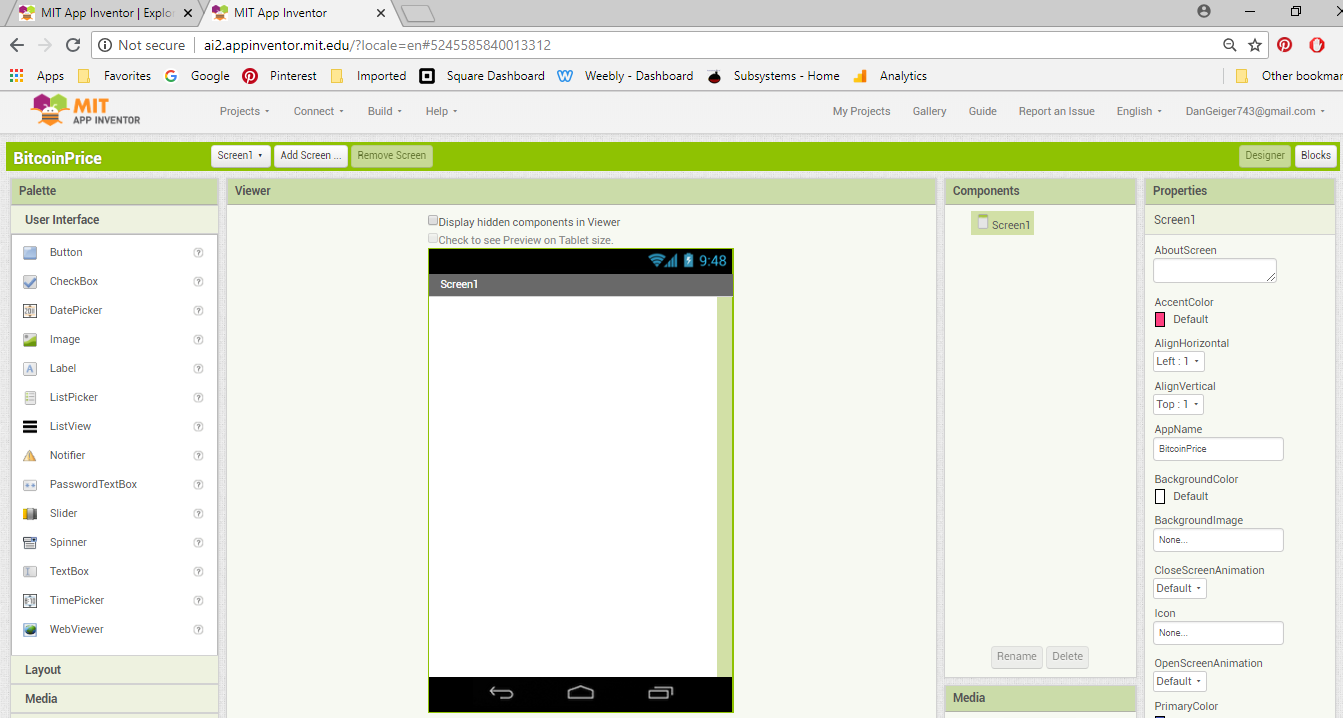
The Designer screen has the following sections:
Palette: Here you will find items to add to your app grouped by function.
Viewer: This is how your app will look on the phone or tablet based on what you have placed on it. Some objects add functionality to your app but do not appear on the screen itself. For instance, we will need an object that communicates with the internet but we don’t want it to appear on the screen.
Components: This is a list of the components you have in your app. Clicking on a component will bring up the Properties for that component.
Properties: This is a list of properties available for the currently selected component. You can set a lot of values for components like color, size, where they are located on the screen, etc. Most of these can also be changed dynamically in your code.
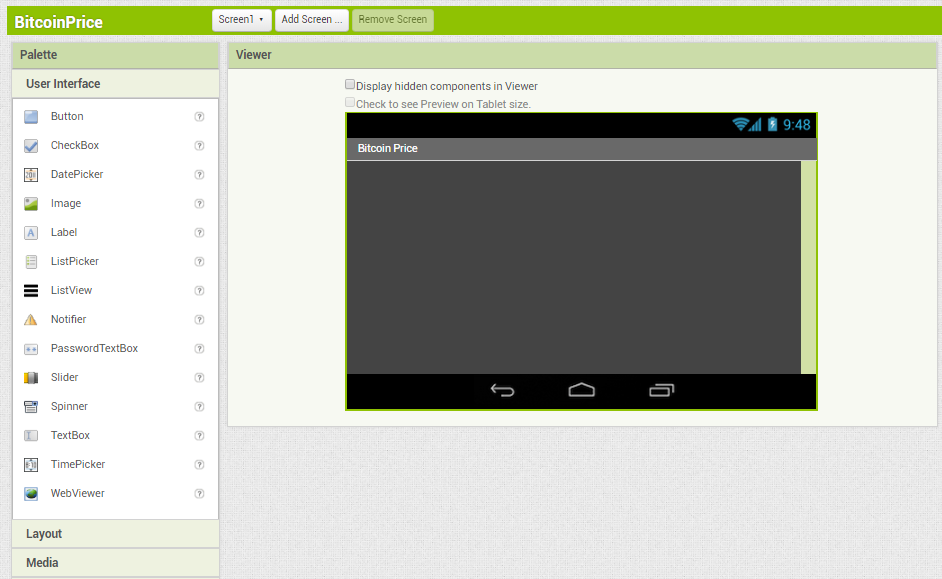
So far all we have is a screen. This is the default component and will hold all of the items we place on it. An app can actually have multiple screens, but we will just need one. Let’s modify some properties of the screen to suit our app. In the properties window make the following changes:
Palette: Here you will find items to add to your app grouped by function.
Viewer: This is how your app will look on the phone or tablet based on what you have placed on it. Some objects add functionality to your app but do not appear on the screen itself. For instance, we will need an object that communicates with the internet but we don’t want it to appear on the screen.
Components: This is a list of the components you have in your app. Clicking on a component will bring up the Properties for that component.
Properties: This is a list of properties available for the currently selected component. You can set a lot of values for components like color, size, where they are located on the screen, etc. Most of these can also be changed dynamically in your code.
So far all we have is a screen. This is the default component and will hold all of the items we place on it. An app can actually have multiple screens, but we will just need one. Let’s modify some properties of the screen to suit our app. In the properties window make the following changes:
- Align Vertical: center
- Background Color: Dark Grey
- Screen Orientation: Landscape
- Title: Bitcoin Price
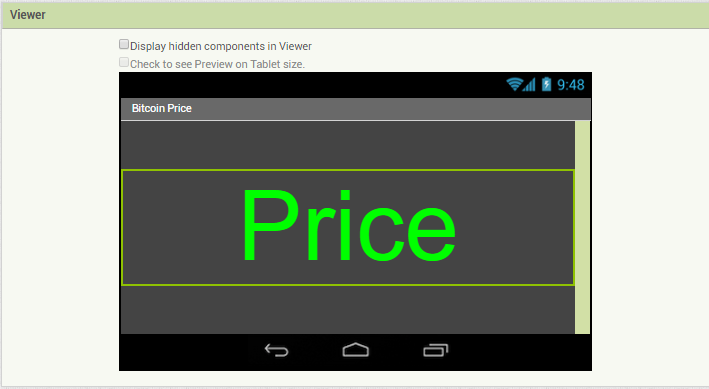
Now, let’s add a component to display the price we retrieve. We could use a TextBox, but they are mostly used when you want to input data. A Label is what we need. It exists to just display data. From the Palette, in the User Interface section, click and drag a Label to the screen. It will add a label to the center since we told the screen to vertically align to the center.
Just like we did for the screen, let’s set some of the properties of the label.
Just like we did for the screen, let’s set some of the properties of the label.
- Font size: 120
- Width: fill parent
- Text: Price
- Text Color: Green (or any color you think looks good)
- TextAlignment: center
That is it for the visual features of this app. We really just want to show the Bitcoin price. However, there are two things we will want to add.
Add a Clock to time our price requests from the server.
In the Palette under the Sensors section, click and drag a clock to the app screen. When you drop it on, it will show up just below the screen in a section called non-visible components.
The clock is a device that can trigger events at a given interval. In our case, the clock will initiate a request for an updated price. We want to balance the desire to have updated prices with the desire to limit the amount of power and internet traffic this little app uses. Let’s get a new price every 10 seconds. The clock is set in thousandths of a second so that would be an interval of 10,000. In the Properties window set the TimerInterval to 10000. The check boxes should be checked. We want the clock to be running as soon as the app starts.
Add an internet connection so we can ask the server to fetch the current price.
In the Palette under the Connectivity section, click and drag a Web component to the app screen. This component will connect us to the internet and allow us to get the price we want.
To do this, we are going to use CoinDesk. CoinDesk is a popular site presenting news and articles on cryptocurrencies. They are also generous enough to offer their prices for free. They add the following to use of their database:
CoinDesk provides a simple API to make its Bitcoin Price Index (BPI) data programmatically available to others. You are free to use this API to include our data in any application or website as you see fit, as long as each page or app that uses it includes the text “Powered by CoinDesk”, linking to our price page. CoinDesk data is made available through a number of HTTP resources, and data is returned in JSON format. Please do not abuse our service.
So please make sure if you use this beyond this demonstration app, you will follow their guidance.
If you visit their page at https://www.coindesk.com/api/ you will see that if we send them a request to the following address: https://api.coindesk.com/v1/bpi/currentprice.json we will receive a file with the price in it. We will just need to extract that price and post it to our label and we will have our app.
In the Properties section for the Web component,
Set the URL to https://api.coindesk.com/v1/bpi/currentprice.json
In our code, we will tell this Web component to GET. This GET method tells the Web component to send the request to the URL it has and wait to receive a response.
The response looks a little hairy:
{"time":{"updated":"Jul 29, 2018 01:31:00 UTC","updatedISO":"2018-07-29T01:31:00+00:00","updateduk":"Jul 29, 2018 at 02:31 BST"},"disclaimer":"This data was produced from the CoinDesk Bitcoin Price Index (USD). Non-USD currency data converted using hourly conversion rate from openexchangerates.org","chartName":"Bitcoin","bpi":{"USD":{"code":"USD","symbol":"$","rate":"8,242.1125","description":"United States Dollar","rate_float":8242.1125},"GBP":{"code":"GBP","symbol":"£","rate":"6,290.2566","description":"British Pound Sterling","rate_float":6290.2566},"EUR":{"code":"EUR","symbol":"€","rate":"7,061.4381","description":"Euro","rate_float":7061.4381}}}
But we will receive it as text, and App Inventor has some easy tools for finding what we need in this mess.
We are actually done with the components we need to add and the initial properties we want our components to have. Let’s head over to the Blocks section to add the blocks we need to make our app work.
On the upper right, click on the button “Blocks.”
Your screen will look like this:
We are actually done with the components we need to add and the initial properties we want our components to have. Let’s head over to the Blocks section to add the blocks we need to make our app work.
On the upper right, click on the button “Blocks.”
Your screen will look like this:
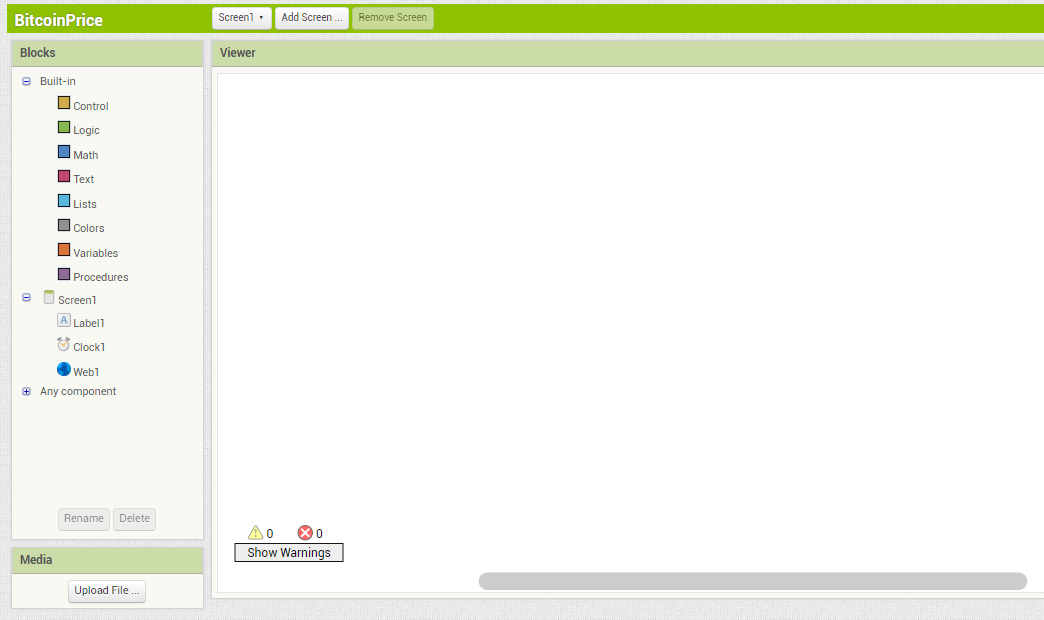
On the left, there is a Blocks section where we can grab blocks we need based on the function we need. On the right, there is blank space. That is because we haven’t done any code work yet. Let’s get started.
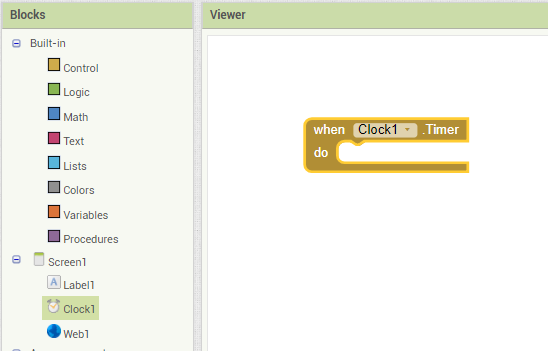
The first thing to do is get the Web component to GET our data when the clock says it is time. We will do this by looking at the options available to us in the clock component. In the Blocks section, you will notice there is a sub-section for Screen1 that has all of the components we placed on the screen. Click on the Clock1 and a list of the possible blocks associated with the clock will pop up.
The first thing to do is get the Web component to GET our data when the clock says it is time. We will do this by looking at the options available to us in the clock component. In the Blocks section, you will notice there is a sub-section for Screen1 that has all of the components we placed on the screen. Click on the Clock1 and a list of the possible blocks associated with the clock will pop up.
At the top of the list there is a block that run code whenever the timer times out. This is the block we need. We want to send the GET request every timer interval. Grab this block and place it on the right work area.
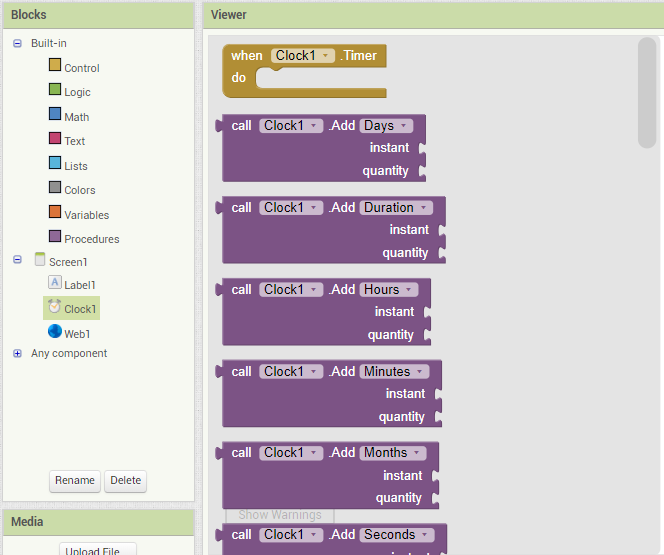
Since the code we want to execute is associated with the Web component, click on it to see the available blocks.
Notice there is a block call Web1.Get. This is the block we need and since we loaded the URL in the component itself, it is already to execute the request. Add this block to the inside of the Clock block.
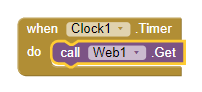
That is all we need to call for the price data.
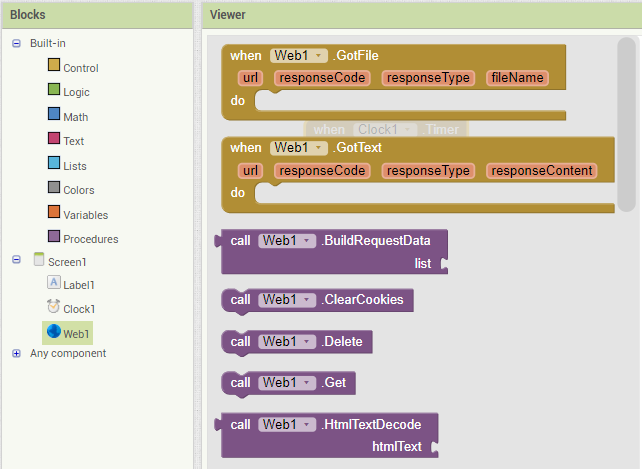
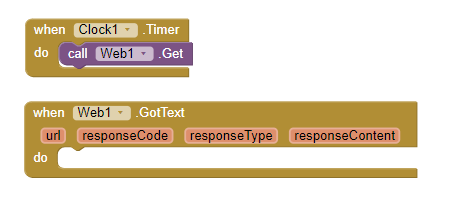
Now we need to be able to receive and display the data. Again, receiving data sounds like a function of the Web component. Click on it to see the available blocks again. The when.Web1.GotText block runs the code contained in it when the response from the price server is received. And the response is available in the variable responseContent.
Now we need to be able to receive and display the data. Again, receiving data sounds like a function of the Web component. Click on it to see the available blocks again. The when.Web1.GotText block runs the code contained in it when the response from the price server is received. And the response is available in the variable responseContent.
It would be awesome if the only thing in the response was the price. But you saw above the mess we get back so we will need to extract the price from the large text block. We will do that with some of the Text blocks that let us examine, cut, and parse text. To help us, let’s create a variable to hold the text as we work on it.
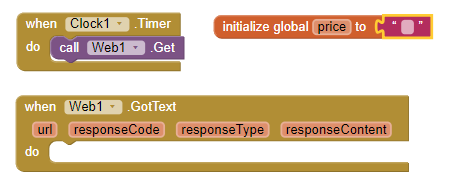
In the Blocks section, click on the Variables item and see the blocks available. We want to establish a global variable so select the initialize.global(name)to block and click on name and change it to price.
We want to initialize this variable so click on Text and grab the top entry which is a way to add some text to blocks and drag it to the right side of the variable block. It should look like the following:
So let’s look at how we might extract the price data from our response text. A section of the returned text is as follows:
openexchangerates.org","chartName":"Bitcoin","bpi":{"USD":{"code":"USD","symbol":"$","rate":"8,242.1125","description":"United States
Right before the desired price data (8,242.1125) we see the text “rate”:
We can use a block that lets us select a section of text starting at a certain position. We can get that position from another block that will give us the position of text we supply. Let’s start by looking for the “rate” text and getting rid of everything before it.
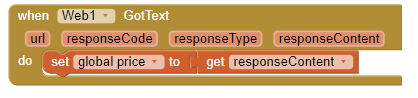
First, load our variable “price” with the contents of the response. If you hover over blocks, you can get help for what the block does. If you hover over sections of the block, you will get popup block options. Assign our variable as follows:
openexchangerates.org","chartName":"Bitcoin","bpi":{"USD":{"code":"USD","symbol":"$","rate":"8,242.1125","description":"United States
Right before the desired price data (8,242.1125) we see the text “rate”:
We can use a block that lets us select a section of text starting at a certain position. We can get that position from another block that will give us the position of text we supply. Let’s start by looking for the “rate” text and getting rid of everything before it.
First, load our variable “price” with the contents of the response. If you hover over blocks, you can get help for what the block does. If you hover over sections of the block, you will get popup block options. Assign our variable as follows:
To get rid of the text before the desired price, we will use the following:
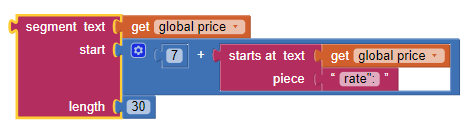
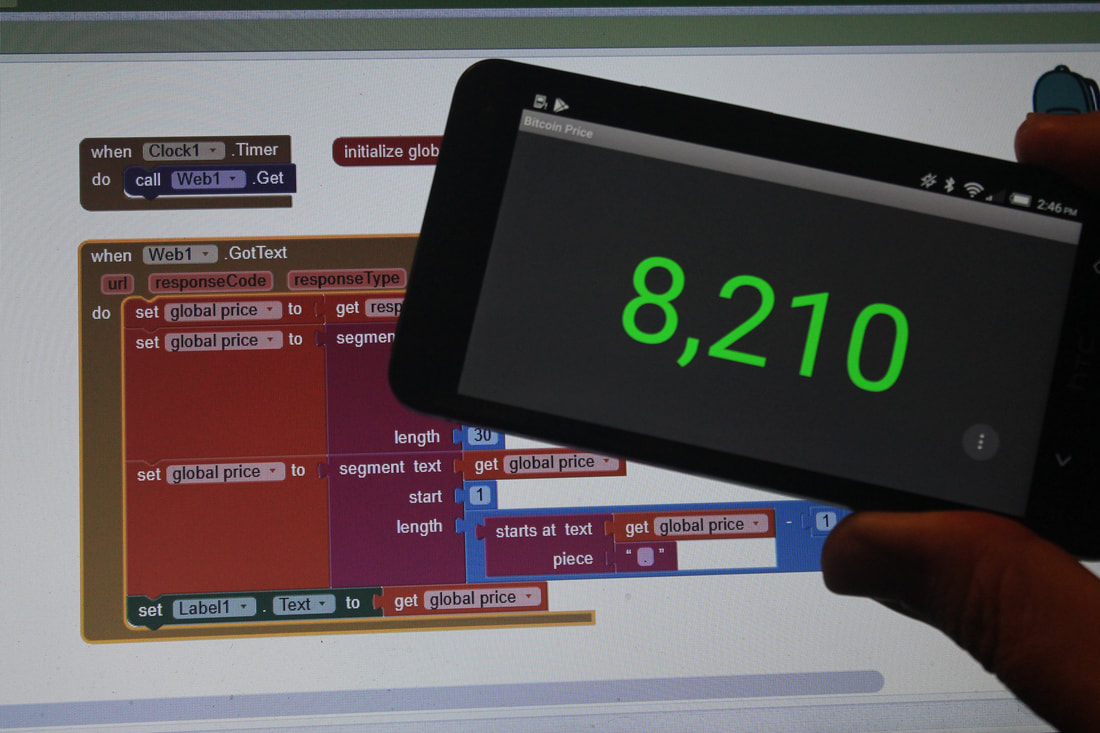
Let’s walk though this. The first block (from the Text menu) grabs a segment of text from the large text (text) starting from some point (start) with a length of (length). The text we want is currently stored in our “price” variable. The start is calculated by first looking up the position of “rate”: in the text and then adding 7 to it to get to the start of the actual price. We then grab the next 30 characters to ensure we get the whole price.
This leaves the variable “price” starting with our price, but having a lot of other unwanted information. Let’s cut off the back end now. We only want to display the whole number of price, so we can look for the decimal point as the end of our number and back off one to not include the point.
This leaves the variable “price” starting with our price, but having a lot of other unwanted information. Let’s cut off the back end now. We only want to display the whole number of price, so we can look for the decimal point as the end of our number and back off one to not include the point.
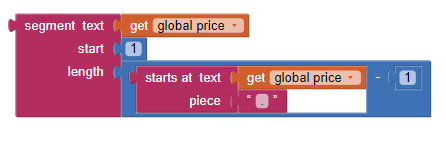
Here we will do the same process, except we will start at the first character and go until we find the decimal point and back off one. This should leave variable “price” with just the whole dollar value.
The last thing is to post this value to the label.
The whole block code should look like this:
The last thing is to post this value to the label.
The whole block code should look like this:
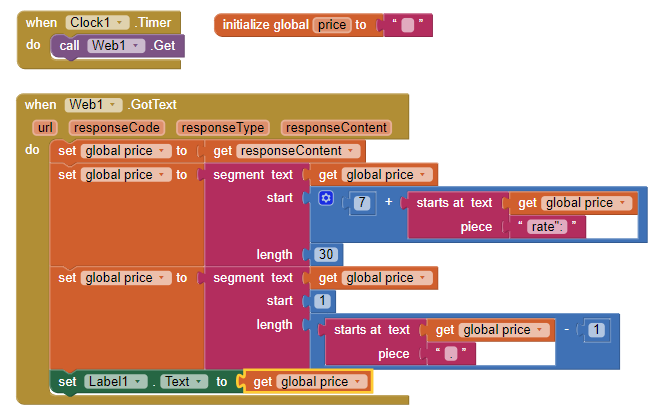
That is it for code. Now we just need to load this onto the phone.
MIT makes this easy too. They have an app in the Google Play Store to make transferring this app to your phone seamless.
Install the MIT App Inventor app from the app store. When you run the app, you will see the following screen:
MIT makes this easy too. They have an app in the Google Play Store to make transferring this app to your phone seamless.
Install the MIT App Inventor app from the app store. When you run the app, you will see the following screen:
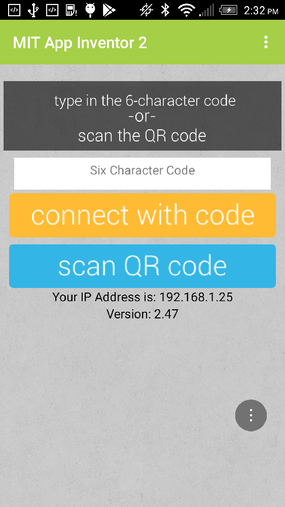
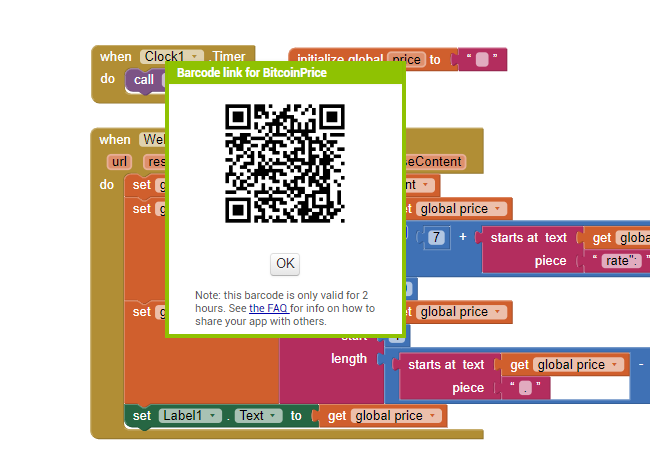
In the “build” menu in App Inventor, select APP (provide QR code for .apk). App Inventor will then compile your code into an APK file (an Android application file). When it is complete, you will be provided with a QR code.
Back in the phone app, click the “scan QR code” button. This will activate your phone’s camera. Point it at the QR code on the screen.
Back in the phone app, click the “scan QR code” button. This will activate your phone’s camera. Point it at the QR code on the screen.
When the camera captures the code, the app will download to your phone. You will first be presented with a screen that presents the permissions required and has you verify you want to install.
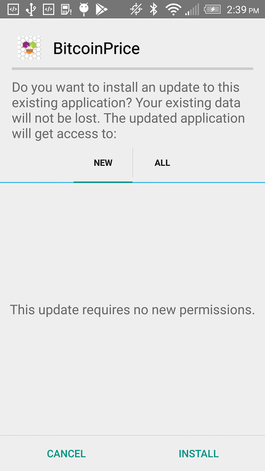
Click install to install this app on your phone. When it is complete, you will have the option to launch it right from the MIT app.
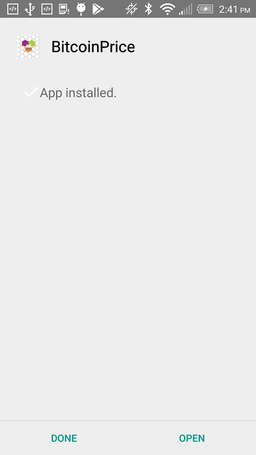
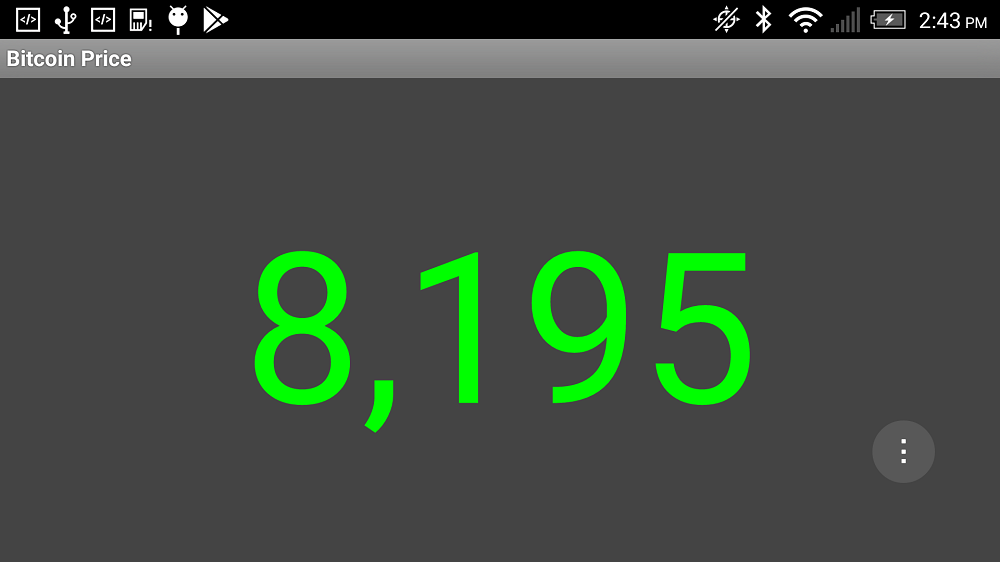
Click open to run the new app and presto! Initially the display will say Price, but after the first timer delay (10 secs) it will update with the current Bitcoin price.
There is so much more you can do with your old Android phone and App Inventor. I hope we have whet your appetite to want to do more.
